Do you want fresh vegetables, herbs, or flowers right outside your door? You don’t need a big yard or years of experience. You need a small space, a little time, and this guide. Learning how to start a small home garden is easier than most people think, and once you begin, you may never want to stop.
In this post, we will walk through every step in simple words. No hard gardening terms. No confusing science. Just plain, easy steps that anyone can follow, even if you have never grown a single plant in your life.
By the end, you will know how to pick the right spot, prepare your soil, choose the best plants, plant them the right way, and keep them healthy. Let’s get started.
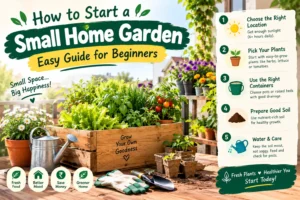
Why Start a Small Home Garden?
Before we get into the “how,” let’s talk about the “why.” A small home garden gives you many good things in return for a little work.
Fresh food: There is nothing like eating a tomato or a handful of herbs that you grew yourself. It tastes better, and you know exactly what went into it.
Save money: Buying seeds is much cheaper than buying vegetables at the store every week. Over time, a small garden can save you real money on groceries.
Less stress: Many people say gardening helps them relax. Digging in the dirt, watching plants grow, and spending time outside can lower stress and boost your mood.
Good exercise: Digging, weeding, and watering all use your body. It’s a gentle way to stay active without going to a gym.
Good for the planet: Growing your own food means less packaging, less driving to the store, and less waste.
A fun hobby for the family: Kids love to watch seeds turn into real food. It teaches patience and gives everyone something to be proud of.
With all these good reasons, let’s move into the steps.
Step 1: Pick the Right Spot
The very first step in starting a small home garden is choosing where to put it. This step matters a lot, so don’t rush it.
Look for Sunlight
Most vegetables and flowers need a lot of sun. Try to find a spot that gets at least six hours of direct sunlight each day. Walk around your yard or balcony at different times of the day and watch how the sunlight moves. Some spots may look sunny in the morning but shady by afternoon.
If you only have a shady spot, don’t worry. Some plants, like lettuce, spinach, and many herbs, can grow with less sun. Just don’t expect big harvests of sun-loving plants like tomatoes or peppers in a shady area.
Check the Drainage
Your garden spot should drain water well. This means that after it rains, water should soak into the ground and not sit on top in puddles. If water pools up in a spot, plant roots can rot. You can test this by pouring a bucket of water on the ground and watching how fast it disappears.
Stay Close to Water
Try to pick a spot near a hose or water source. If your garden is far from water, you will need to carry heavy watering cans back and forth, which gets tiring fast. A garden close to your home is also easier to check on every day.
Think About Size
For beginners, small is smart. A tiny garden that you take good care of will always beat a big garden that you cannot manage. You could start with:
- A small raised bed (about 4 feet by 4 feet)
- A few large containers or pots on a patio
- A small strip of ground along a fence or wall
You can always make your garden bigger next year once you learn what works.
Step 2: Decide Between Containers, Raised Beds, or In-Ground Planting
There are three main ways to grow a small home garden. Each one has good points, so pick the one that fits your space and budget best.
Containers
Containers are pots, buckets, or grow bags. They are perfect if you have a balcony, patio, or very small yard. Containers are simple to set up, and you can move them around to follow the sun.
The only downside is that plants in containers dry out faster, so you will need to water them more often, sometimes every day in hot weather.
Raised Beds
A raised bed is a box built above the ground and filled with soil. Raised beds are great because you control the quality of the soil from the start, and they often have fewer weeds than ground planting. They are also easier on your back since you don’t have to bend down as far.
Raised beds do cost a bit more money at the start because you need wood or another material to build the box, plus soil to fill it.
In-Ground Planting
This means planting straight into the soil that is already in your yard. It’s the cheapest option since you don’t need extra materials. However, it does mean more work upfront to prepare the soil, and you may deal with more weeds.
If you are unsure, a small raised bed is often the easiest choice for beginners. It gives you good control without too much cost or effort.
Step 3: Prepare Your Soil
Good soil is the base of a good garden. Even the best seeds will struggle in poor soil, so this step is worth doing right.
Test Your Soil (Optional but Helpful)
You can buy a simple soil test kit at a garden store, or send a sample to your local extension office. A soil test tells you the pH level (how acidic or basic your soil is) and what nutrients your soil has or lacks. Most vegetables like a pH close to neutral, which is about 6.5 to 7.
You don’t have to test your soil to start a garden, but it can help you understand why some plants may not grow well.
Clear the Area
Remove any grass, weeds, rocks, or trash from your garden spot. If you’re planting in the ground, you can use a shovel or a hoe to turn over the top layer of soil.
Add Compost or Organic Matter
Compost is decayed plant material that adds nutrients back into the soil. Mixing compost into your soil before planting gives your plants a big head start. You can buy bagged compost at a garden store, or make your own from food scraps and yard waste over time.
A good rule of thumb is to mix a few inches of compost into the top layer of your soil.
Loosen the Soil
Plant roots need loose, soft soil to grow into. Use a shovel, hoe, or garden fork to break up hard, packed dirt. This lets air, water, and roots move through the soil more easily.
Step 4: Gather Basic Garden Tools
You don’t need a shed full of expensive tools to start a small home garden. Here are the basic items that will cover most of your needs:
- Hand trowel – a small shovel for digging holes and moving soil
- Garden gloves – to protect your hands from dirt, thorns, and blisters
- Watering can or hose – to water your plants
- Garden fork or hoe – for turning and loosening soil
- Pruning shears – for trimming plants and cutting off dead leaves
- Plant labels or tags – so you remember what you planted and where
You can find beginner tool sets at most hardware or garden stores for a low price. There’s no need to buy expensive tools right away.
Step 5: Choose Easy Plants for Beginners
Picking the right plants can make or break your first garden. Some plants are simple and forgiving, while others need more skill and care. As a beginner, start with plants that are known to be easy.
Easy Vegetables
- Lettuce – grows fast and doesn’t need much space
- Radishes – ready to harvest in as little as three to four weeks
- Green beans – simple to grow and produce a lot of food
- Cucumbers – grow quickly in warm weather
- Zucchini – very easy to grow, though one or two plants is often enough for a small garden
- Cherry tomatoes – more forgiving than large tomato varieties
Easy Herbs
- Basil – loves warm weather and grows fast
- Mint – very hardy, though it can spread a lot, so many people grow it in its own pot
- Chives – simple to grow and comes back year after year
- Parsley – handles cooler weather well
Easy Flowers
- Marigolds – bright, cheerful, and known to keep some pests away
- Sunflowers – simple to grow and fun for kids to watch
- Zinnias – colorful and bloom for a long time
Choosing three to five types of plants is a smart plan for your first garden. This keeps your workload manageable while still giving you a nice variety.
Step 6: Decide Between Seeds and Seedlings
You have two choices when starting your plants: seeds or seedlings (small young plants bought from a nursery).
Starting from Seeds
Seeds are cheaper and give you more choices in plant types. However, some seeds take longer to grow into a full plant, and a few plants can be tricky to start from seed.
Starting from Seedlings
Seedlings, sometimes called starter plants or transplants, are already a few weeks old when you buy them. They cost more than seeds, but they save you time and are often easier for beginners since the hardest early growing stage is already done.
Many gardeners use both. For example, they might buy tomato seedlings but plant lettuce and bean seeds directly in the ground since those grow quickly and easily from seed.
Step 7: Plant the Right Way
Now comes the fun part: putting your plants in the ground.
Follow the Seed Packet Directions
Every seed packet has directions on the back. It will tell you:
- How deep to plant the seed
- Or far apart to space each plant
- How much sun the plant needs
- When to plant based on the season
A general rule for seeds is to plant them about as deep as three times their own width. So a small seed goes in shallow, while a bigger seed goes a bit deeper.
Give Plants Enough Room
It’s tempting to plant things close together, but every plant needs room for its roots and leaves to grow. Crowded plants compete for water, light, and nutrients, and this often leads to smaller harvests. Always follow the spacing directions on the seed packet or plant tag.
Water Right After Planting
After you plant seeds or seedlings, water the area gently but thoroughly. This helps settle the soil around the roots and gives the plant a good start.
Check the Weather
If you are planting heat-loving plants like tomatoes, peppers, or cucumbers, wait until the danger of frost has passed in your area. Planting too early can kill young plants in a cold snap.
Step 8: Water Your Garden the Right Way
Watering seems simple, but many beginners either overwater or underwater their plants.
How Much to Water
Most vegetable gardens need about one inch of water per week, either from rain or from you. A simple way to check is to stick your finger about two inches into the soil. If it feels dry, it’s time to water. If it still feels moist, you can wait.
When to Water
Early morning is the best time to water. This gives plants time to soak up water before the heat of the day, and it helps prevent problems like fungus that can grow on wet leaves overnight.
Container Plants Need More Water
If you’re growing in pots or containers, remember they dry out faster than garden beds or ground soil. In hot weather, container plants may need water every single day.
Step 9: Keep an Eye on Weeds and Pests
Weeds and pests are two of the biggest challenges in any garden, but small gardens are much easier to manage than big ones.
Weeding
Weeds steal water, sunlight, and nutrients from your plants. Try to pull weeds while they are still small, before their roots grow deep. A layer of mulch, like straw or wood chips, on top of your soil can help block weeds from growing in the first place, and it also helps keep the soil moist.
Pests
Not every bug is bad. Many insects are helpful and even pollinate your plants. But some pests, like aphids or slugs, can damage your plants.
Here are a few simple, low-cost ways to handle pests:
- Check your plants often so you catch problems early
- Remove pests by hand when you see them
- Use natural sprays, like a mix of water and mild soap, on affected leaves
- Plant marigolds nearby, since some gardeners believe they help keep certain pests away
Try to avoid strong chemical pesticides, especially if you are growing food. Simple, natural methods are often enough for a small home garden.
Step 10: Feed Your Plants
Just like people, plants need food to grow strong. This food comes in the form of nutrients in the soil.
Compost
Adding compost is one of the best and easiest ways to feed your soil naturally. It slowly releases nutrients over time and improves the soil’s structure.
Fertilizer
If your soil needs an extra boost, you can use a fertilizer from a garden store. Fertilizers come in different types, such as slow-release granules or liquid feeds you mix with water. Always follow the directions on the package, since using too much fertilizer can actually harm your plants.
Step 11: Watch Your Garden Grow and Learn as You Go
Gardening is not something you master in one season. Even experienced gardeners are still learning new things every year. Here are some tips to help you improve over time:
- Keep notes: Write down what you planted, when you planted it, and how it turned out. This helps you remember what worked and what didn’t for next year.
- Don’t be afraid of mistakes: Some plants may not survive, and that’s normal. Every gardener loses a few plants along the way.
- Ask for help: Local garden centers, neighbors with gardens, or online gardening groups can offer great advice suited to your area.
- Enjoy small wins: Even one ripe tomato or one bunch of fresh herbs is a real success worth celebrating.
Common Mistakes Beginners Make (and How to Avoid Them)
Learning from common mistakes can save you a lot of time and frustration.
Planting too much at once: New gardeners often get excited and buy too many seeds. Then summer comes, and everything grows at the same time, leaving you overwhelmed with more vegetables than you can use. Start small, with just a few types of plants.
Ignoring sunlight needs: Placing sun-loving plants in a shady spot is a common reason for poor growth. Always check how much sun your spot really gets before planting.
Overwatering: More water is not always better. Too much water can drown roots and cause rot. Check the soil before watering instead of watering on a fixed schedule.
Skipping soil preparation: Some beginners just stick seeds into hard, poor soil and hope for the best. Taking the time to loosen the soil and add compost makes a huge difference in results.
Planting too early or too late: Planting warm-weather crops before the last frost, or cool-weather crops in the middle of summer heat, can lead to poor growth or dead plants. Always check your local planting calendar or frost dates.
A Simple Weekly Garden Routine
To help keep things simple, here is an easy routine you can follow once your small home garden is planted:
- Every day: Check container plants for dryness, especially in hot weather
- Every 2-3 days: Check garden bed or ground soil moisture
- Once a week: Look for weeds and pull any you find
- Once a week: Check plants closely for pests or damaged leaves
- Every 2-4 weeks: Add compost or fertilizer if your plants seem to be growing slowly
Following a simple routine like this takes just a few minutes a day but keeps your garden healthy and productive.
Final Thoughts on Starting a Small Home Garden
Starting a small home garden does not have to be hard or expensive. With a sunny spot, decent soil, a few easy plants, and a little regular care, almost anyone can grow their own food or flowers at home.
Remember these key steps:
- Pick a sunny, well-drained spot
- Choose containers, a raised bed, or in-ground planting
- Prepare your soil with compost
- Gather a few basic tools
- Choose easy plants suited for beginners
- Plant seeds or seedlings the right way
- Water consistently and correctly
- Manage weeds and pests naturally
- Feed your soil over time
- Learn and improve every season
Every big garden started as a small one. Your small home garden can grow into something you’re proud of, one season at a time. So grab your gloves, pick your spot, and start digging. Your first harvest is closer than you think.