Your roof does a big job. It keeps rain, snow, wind, and sun out of your home year-round. But over time, it can get dirty. You may see dark streaks, green moss, or black spots on your shingles. This is normal, but it does not look nice. It can also cause damage if you leave it for too long.
The good news is that you do not need to be a professional to clean your roof. With the right tools, the right steps, and a little bit of care, you can clean your roof yourself. This guide will show you how to do it easily, step by step.
We will talk about why roofs get dirty, what tools you need, how to clean safely, and how to keep your roof clean for longer. Let’s get started.
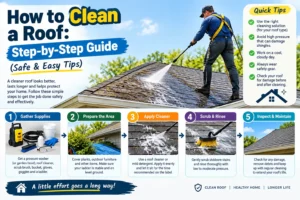
Why Does a Roof Get Dirty?
Before we clean the roof, it helps to know why it gets dirty in the first place. There are a few common reasons.
1. Algae
The dark streaks you see on many roofs are often caused by algae. This algae is called Gloeocapsa magma. It loves warm, wet places. It feeds on the limestone filler in asphalt shingles. Algae does not always hurt your roof right away, but it makes your home look old and dirty.
2. Moss
Moss looks like small green clumps or patches. It grows in shady, damp spots on your roof, often near trees. Moss is more than just an eyesore. It holds water against your shingles. Over time, this can lift shingles and cause leaks.
3. Dirt and Debris
Leaves, twigs, dust, and small branches can pile up on your roof, especially near valleys and edges. This debris traps moisture, which can lead to mold, algae, and even rot in the wood underneath.
4. Lichen
Lichen looks like a crusty, flat patch on the roof. It can be white, gray, or greenish. Lichen grabs onto shingles tightly, which makes it harder to remove than algae or moss.
5. Mold
Mold is more serious. It looks slimy and can be black, green, or brown. Mold can be harmful to breathe, so if you see a lot of mold, it may be safer to call a professional instead of doing it yourself.
Knowing what kind of dirt or growth is on your roof helps you pick the right cleaning method.
Is It Safe to Clean Your Own Roof?
This is an important question. Roofs are sloped, and they can be slippery, especially when wet. Falls from roofs can cause serious injury. So before you decide to clean your roof yourself, think about these points:
- How steep is your roof? A roof with a gentle slope is safer to walk on than a steep one.
- How tall is your house? A one-story home is much safer than a two- or three-story home.
- Do you have the right safety gear? This includes a sturdy ladder, non-slip shoes, and ideally a safety harness.
- Is the weather good? Never clean a roof in the rain, high wind, or extreme heat.
- How comfortable are you with heights? If you feel nervous on a ladder, a roof will likely feel much worse.
If you answered “no” to any of these, it is safer to hire a professional roof cleaning company. There is no shame in that. Many of the steps in this guide can also be done from the ground or from a ladder, which makes things much safer.
Tools and Materials You Will Need
Here is a simple list of what to gather before you start.
Safety Gear
- Sturdy, non-slip shoes or boots
- Work gloves
- Safety goggles
- A safety harness (if you plan to walk on the roof)
- Old clothes you do not mind getting wet or stained
Cleaning Tools
- A tall, sturdy ladder
- A garden pump sprayer or hose-end sprayer
- A soft-bristle brush, ideally one on a long pole (telescoping brush)
- A leaf blower or a soft broom
- A garden hose with a spray nozzle
- Plastic sheeting or an old tarp
Cleaning Solution Options
You do not need harsh chemicals to clean a roof. Here are a few simple options:
- Bleach and water – A mix of one part bleach to one or two parts water. This is strong and works fast, but must be used with care.
- Vinegar and water – Equal parts white vinegar and water. This is gentler and safer for plants, but works a little slower.
- Oxygen bleach and water – Mix one part oxygen bleach with one part water. This is a milder option than chlorine bleach.
- Commercial roof cleaner – Many hardware stores sell ready-made roof cleaning sprays, such as “Spray and Forget” or similar products. These are easy to use but can take a few months to show full results.
Whichever option you pick, always test it on a small, hidden part of your roof first to make sure it does not damage the shingles or change their color.
Step-by-Step Guide to Cleaning Your Roof
Now let’s go through the full process, one step at a time.
Step 1: Pick the Right Day
Choose a dry, cloudy day with little to no wind. Cloudy weather is better than sunny weather because the cleaning solution will not dry too fast on hot shingles. Avoid rainy days, since rain will wash away your cleaning solution before it can work. Also avoid very hot afternoons, since standing water and chemicals can be riskier in extreme heat.
Step 2: Clear the Roof of Loose Debris
Before you apply any cleaning solution, remove leaves, twigs, and other loose debris. You can do this with:
- A leaf blower, used from a ladder or while standing safely on the roof
- A soft broom, sweeping gently downward
- Your gloved hands, for small areas
Clearing debris first means your cleaning solution can reach the algae, moss, or dirt directly, instead of just sitting on top of leaves and twigs.
Step 3: Protect Plants and Landscaping
Cleaning solutions, especially bleach, can harm grass, flowers, and bushes below your roof. Before you start spraying, do the following:
- Water your plants well. Wet plants absorb less of the cleaning solution.
- Cover delicate plants with plastic sheeting or an old tarp.
- Move potted plants away from the work area if you can.
- Rinse plants again after you finish cleaning, just to be safe.
This simple step can save your garden from damage.
Step 4: Mix Your Cleaning Solution
Follow the mixing ratio for whichever solution you picked earlier. A few examples:
- Bleach method: Mix one part bleach with one to two parts water in a bucket or garden sprayer.
- Vinegar method: Mix equal parts white vinegar and water.
- Oxygen bleach method: Mix one part oxygen bleach cleaner with one part water.
Always wear gloves and goggles while mixing, since splashes can happen. Mix your solution in a well-ventilated outdoor area, never indoors.
Step 5: Apply the Solution to the Roof
Using your garden pump sprayer or hose-end sprayer, apply the solution evenly over the dirty areas of the roof. Here are some tips to do this safely and well:
- Start at the top of the roof and work your way down. This lets the solution flow naturally over the area you already sprayed.
- Spray evenly, but do not soak the roof completely.
- If you are working from a ladder, only spray the parts of the roof you can safely reach.
- Avoid walking on wet shingles, since they become very slippery.
Step 6: Let the Solution Sit
This is one of the most important steps, and it is also the easiest. After spraying the solution, let it sit on the roof for 15 to 30 minutes. This gives it time to kill algae, moss, and mold at the root.
Do not let the solution dry out completely on the roof, since this can make it harder to rinse off later and may leave marks. If you notice it drying too fast in the sun, you can lightly mist the area with water to keep it working.
Step 7: Gently Scrub Stubborn Spots
For areas with thick moss or heavy stains, a light scrub can help. Use a soft-bristle brush, ideally one attached to a long pole so you can work from the ground or a ladder. Follow these tips:
- Always scrub gently. Never use a wire brush or stiff bristles.
- Work in the same direction as the shingles, not against them.
- Do not press too hard. The goal is to loosen dirt, not scrape off the shingle surface.
- Avoid scrubbing too much in one spot, since this can wear down the protective granules on the shingles.
Step 8: Rinse the Roof
Once the solution has done its job, rinse the roof thoroughly with clean water. Use a garden hose with a spray nozzle set to a gentle stream. This step is very important:
Never use a pressure washer on a roof: High-pressure water can strip away the protective granules on shingles, force water under the shingles, and cause leaks. It can also damage tiles, metal panels, or wood shakes. A low-pressure rinse from a hose is much safer and still gets the job done.
Rinse from the top of the roof downward, just like when you applied the solution. Make sure all the cleaning solution is washed away, especially if you used bleach, since leftover bleach can continue to affect the shingles and nearby plants.
Step 9: Clean the Gutters
While you are already working on the roof, it is a good time to clean out the gutters too. Leaves, twigs, and dirt often collect here, and clogged gutters can cause water to back up onto your roof. Use gloved hands or a small scoop to remove debris, then flush the gutters with your garden hose to make sure water flows freely.
Step 10: Let the Roof Air Dry
After rinsing, allow your roof to air dry naturally. Avoid walking on it again until it is fully dry, since wet shingles are slippery and can be damaged more easily when someone is standing on them.
Step 11: Rinse Your Plants Again
Once you are done cleaning the roof, give your garden a final rinse with clean water. This helps wash away any leftover cleaning solution that may have dripped down during the process, protecting your grass and plants.
What About Moss That Will Not Come Off?
Sometimes moss does not rinse away right after cleaning, and that is normal. The cleaning solution kills the moss, but it may take a few days or even a couple of weeks for it to dry out, loosen, and fall off on its own, especially with help from wind and rain.
If moss is still stuck after a few weeks, you can:
- Use a leaf blower to loosen and blow away the dead, dried moss.
- Gently scrape it off with a plastic putty knife or soft brush, being very careful not to damage the shingles.
- Apply a second treatment of your cleaning solution if the moss is especially thick.
Patience is important here. Trying to force moss off too soon or too hard can hurt your shingles more than the moss itself.
Roof Cleaning by Material Type
Different roofing materials need slightly different care. Here is a simple breakdown.
Asphalt Shingle Roofs
This is the most common roof type in many homes. Asphalt shingles are covered in small granules that protect them from the sun. These granules can be scraped off if you scrub too hard or use a pressure washer, so always be gentle. Low-pressure rinsing and soft brushes work best here.
Metal Roofs
Metal roofs are usually easier to clean since dirt and algae do not stick as deeply. A simple mix of mild soap and water, applied with a soft brush, is often enough. Avoid abrasive scrubbers, since they can scratch the protective coating on the metal.
Tile and Clay Roofs
Tile roofs can be cleaned in a similar way to asphalt, using a mild solution and a soft brush. Walk carefully, since tiles can crack under too much weight, especially older ones. It is often smart to check with a professional before walking on a tile roof.
Wood Shake Roofs
Wood roofs need extra care. Harsh chemicals like bleach can dry out and damage the wood over time. A gentler cleaner made for wood roofs, combined with a soft brush and low-pressure rinse, is usually the safest choice.
How to Prevent Your Roof From Getting Dirty Again
Cleaning your roof is great, but keeping it clean is even better. Here are some simple ways to slow down algae, moss, and dirt buildup.
1. Trim Overhanging Branches
Branches that hang over your roof create shade, which keeps your roof damp for longer after it rains. Trimming these branches back lets more sunlight reach your roof, which helps prevent moss and algae from growing.
2. Clean Your Gutters Regularly
Clogged gutters trap water and debris, which can spread to your roof. Try to clean your gutters at least twice a year, or more often if you have many trees nearby.
3. Install Zinc or Copper Strips
Zinc or copper strips can be installed near the peak of your roof. When it rains, tiny amounts of zinc or copper wash down over the shingles. This creates a surface that algae and moss do not like to grow on. This is a simple, long-lasting way to help prevent future buildup.
4. Remove Debris Often
Try to clear off leaves, twigs, and other debris a few times a year, especially in fall when leaves drop the most. A leaf blower is an easy, safe way to do this from the ground or a ladder.
5. Choose Algae-Resistant Shingles
If you are replacing your roof soon, ask about algae-resistant shingles. These shingles have added copper or zinc granules built in, which helps stop algae from growing in the first place.
6. Schedule Regular Cleanings
Even with prevention, most roofs benefit from a full cleaning every two to three years, depending on your climate, shade, and tree coverage. Homes in wet, shady areas may need cleaning more often than homes in dry, sunny areas.
Common Mistakes to Avoid
Even with good intentions, it is easy to make mistakes when cleaning a roof. Here are some of the most common ones.
- Using a pressure washer: This is the number one mistake. High pressure water strips away shingle granules and can force water under the roofing material, causing leaks.
- Scrubbing too hard: Aggressive scrubbing wears down shingles faster than the dirt itself does.
- Cleaning on a hot, sunny day: The solution dries too quickly and may not have time to work properly.
- Skipping safety gear: Roofs are dangerous, even simple looking ones. Never skip a harness, ladder safety, or non-slip shoes.
- Forgetting to protect plants: Bleach and other chemicals can harm grass and flowers if you do not cover or rinse them.
- Walking on a wet roof: Wet shingles are extremely slippery. Wait until they are dry before walking on them again.
- Ignoring the weather: Wind, rain, and extreme heat all make roof cleaning more dangerous and less effective.
Avoiding these simple mistakes will help you get a clean roof without causing damage or getting hurt.
When to Call a Professional
While many people can clean their roofs safely, there are times when it makes more sense to call a professional roof cleaning company. Consider hiring help if:
- Your roof is steep or your home is more than one story tall
- You see large amounts of mold, which can be hazardous to your health
- You do not have the right safety equipment
- You are not confident on a ladder or at heights
- Your roof has visible damage, like missing shingles, that you are not sure how to work around
Professional roof cleaners often use a method called “soft washing.” This uses a gentle, low-pressure spray along with a cleaning solution, letting the chemicals do most of the work instead of physical force. This protects your shingles while still giving strong results. While it costs more than doing it yourself, it can be a safer and longer-lasting option, especially for larger or more complex roofs.
Final Thoughts
Cleaning your roof does not have to be complicated. With the right tools, a safe approach, and a little patience, you can remove algae, moss, dirt, and stains, bringing your roof back to looking clean and fresh. Just remember these key points:
- Always put safety first, and know your limits when it comes to heights.
- Clear debris before applying any cleaning solution.
- Protect your plants and landscaping before you start.
- Use a gentle solution, like diluted bleach or vinegar, and let it sit before rinsing.
- Never use a pressure washer on your roof.
- Rinse thoroughly with low pressure water.
- Take steps to prevent future buildup, like trimming trees and cleaning gutters.
A clean roof does more than improve how your home looks. It also helps protect your shingles, extend the life of your roof, and avoid costly repairs down the road. Whether you decide to do it yourself or call in a professional, regular roof care is one of the simplest ways to take good care of your home for years to come.