Your bathroom is one of the smallest rooms in your home, but you use it every single day. It is the first room you see in the morning and the last one you visit at night. So when it looks old, dull, or messy, it can pull down your whole mood.
The good news is that you do not need a huge budget or a team of workers to fix it. With the right DIY bathroom improvement ideas, you can turn a tired bathroom into a fresh, clean, and calm space. Many of these projects take only a few hours. Some cost less than a nice dinner out.
In this guide, you will find 15 simple upgrades, step-by-step tips, safety advice, and answers to common questions. Every idea is written in plain words, so even if you have never held a paintbrush or a screwdriver, you can follow along.
Let’s get started.
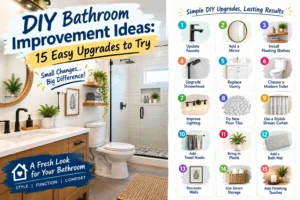
Before You Begin: Make a Simple Plan
It is tempting to run to the store and buy paint, tiles, and new lights right away. But a little planning saves you money, time, and stress. Take ten minutes to think through these questions.
What bothers you most? Stand in the doorway and look around. Is the paint peeling? Is the mirror old? Is there no place to put towels? Write down the top three things you dislike. These are your first projects.
How much can you spend? Pick a number and stick to it. A small budget can still work well. A fresh coat of paint, a new mirror, and some new hardware can change the whole room without costing much. Add about ten percent extra for surprises, because small problems often show up once you start working.
How much time do you have? Some jobs, like changing a showerhead, take fifteen minutes. Others, like painting a vanity, need a full weekend because of drying time. Match your projects to the time you really have.
Do you rent or own? If you rent, choose upgrades that can be undone, like peel-and-stick tiles, removable wallpaper, and new towel bars you can swap back later. Always check with your landlord first.
Take “before” photos: They help you see your progress, and they feel great to look at when the job is done.
Once you have your plan, pick the ideas below that fit your budget, your time, and your skills.
1. Give Your Walls a Fresh Coat of Paint
If you only do one thing from this list, make it paint. Paint is cheap, fast, and gives the biggest change for the least money. It is one of the best DIY bathroom improvement ideas for beginners.
Choose the right paint: Bathrooms are damp, so normal wall paint may peel or grow mold. Look for paint made for bathrooms, or choose one with a satin or semi-gloss finish. These finishes resist water better and are easier to wipe clean. Some paints also have mildew protection built in.
Pick colors that help the room feel good: Light colors like soft white, pale gray, light blue, and sage green make a small bathroom feel bigger and brighter. If you want something bold, try a deep green or navy on one wall only. It looks fancy without making the room feel dark.
Prepare the walls: This step is boring, but it matters most. Wash the walls with mild soap and water to remove dust and soap film. Fill small holes with filler, let it dry, and sand it smooth. Use painter’s tape around the edges, the tub, and the mirror.
Paint in thin coats: Two thin coats look better than one thick coat. Let each coat dry fully. Open a window or run the fan to help the air move.
A single afternoon of painting can make your bathroom feel like a different room.
2. Replace Old Hardware and Fixtures
Small metal parts, like faucets, towel bars, drawer pulls, and toilet paper holders, can make a bathroom look old very quickly. Rust, scratches, and dull finishes stand out.
Swap the cabinet knobs and pulls: This is one of the easiest upgrades you can do. Unscrew the old ones, measure the distance between the screw holes, and buy new ones that match. It takes about ten minutes and often costs very little.
Change the towel bars and hooks: Choose one finish and use it everywhere. Matte black, brushed nickel, chrome, and brushed gold are all popular. When the metal finishes match, the room looks planned and tidy.
Replace the faucet: This sounds hard, but many people do it in an hour or two with basic tools. Turn off the water supply valves under the sink, take the old faucet out, and put the new one in by following the box instructions. Keep a bucket and a towel nearby, because a little water will drip out.
Tip: Take a photo of the old parts before you remove them, and bring it to the store. It helps you buy the right size.
Matching hardware is a quiet upgrade, but people notice it, even if they cannot say why the room feels better.
3. Re-Caulk and Re-Grout for a Clean Look
Look closely at the lines where your tub meets the wall, or where your tiles meet each other. Do you see dark spots, cracks, or gaps? That is old caulk or grout, and it can make even a clean bathroom look dirty.
Why it matters: Cracked caulk lets water seep behind your walls. Over time, this can cause mold and damage that costs a lot to fix. So this job is about protection, not just looks.
How to re-caulk:
- Remove the old caulk with a caulk removal tool or a small scraper.
- Clean the area with rubbing alcohol and let it dry fully.
- Apply painter’s tape above and below the gap for a neat line.
- Squeeze a thin, steady line of bathroom caulk (choose one made for kitchens and baths).
- Smooth it with a wet finger or a caulk tool.
- Pull off the tape right away and let it cure as the package says.
How to re-grout: Use a grout saw to scrape out about a quarter of the old grout depth. Mix new grout, spread it into the lines with a rubber float, and wipe the extra off with a damp sponge. Seal the grout after it cures to keep water and stains out.
If you only want a quick fix, you can also use a grout renewal pen or grout paint to freshen up stained lines. It will not last forever, but it works well for a fast makeover.
4. Refresh Your Vanity Instead of Replacing It
A new vanity can cost a lot, but many old vanities are strong and well built. They just look tired. With some work, you can make yours look brand new.
Paint the vanity: Remove the doors and drawers. Clean everything well with a degreasing cleaner. Lightly sand the surface so the paint can grip. Use a primer made for cabinets, then apply two coats of durable paint. Choose a color that suits your walls, such as white, soft gray, deep green, or navy.
Add new hardware: Once the paint is dry, put on new knobs or handles. This one step makes the vanity look expensive.
Update the countertop: If the top is cracked or stained, you have a few options. You can use a countertop paint kit, cover it with a new laminate sheet, or install a ready-made top. Many home stores sell vanity tops in standard sizes.
Try open shelving underneath: If your vanity is very old, you could remove the doors and use baskets to hold towels and supplies. It looks light and modern, and it costs almost nothing.
Give the paint plenty of drying time before you use the vanity again. Rushing this step is the most common reason for chipped paint.
5. Upgrade the Mirror
A mirror does two big jobs. It helps you get ready, and it makes a small room feel larger by bouncing light around. An old, spotted, or plain builder-grade mirror can drag down the whole space.
Ideas to try:
- Round mirror: It softens the sharp lines of a bathroom and looks modern.
- Framed mirror: You can add a wood or metal frame around your existing mirror using strong adhesive or a ready-made frame kit.
- Large mirror: Go wider than usual, close to the width of your vanity, for a rich look.
- Two mirrors: If you have a double sink, hang two matching mirrors for a neat and balanced look.
- Backlit mirror: These have a soft glow and are great for makeup and shaving. Some plug in, so no wiring is needed.
Safety note: Mirrors are heavy. Use wall anchors if you are not screwing into a wall stud, and ask a friend to help you lift and hang it.
6. Improve Your Bathroom Lighting
Bad lighting can make a nice bathroom feel dull or even unpleasant. Good lighting makes the space feel warm, clean, and open.
Swap the bulbs first: This costs almost nothing. Look for bulbs labeled “soft white” or “warm white” for a cozy feel, or “daylight” for a bright, clean look. For bathrooms, many people like a color in the middle so skin tones look natural.
Replace the light fixture: Old, yellowed, or bug-filled light covers can be replaced with a modern fixture. Choose one that matches your hardware finish.
Add lights on both sides of the mirror: Light that comes from the sides is more even and has fewer shadows on your face than a single light above the mirror.
Try plug-in or battery options: If you do not want to touch any wiring, wall sconces that plug in, or battery-powered stick-on lights, can add a lot of charm.
Important safety warning: If you are changing a fixture that connects to your home’s wires, always turn off the power at the breaker box first and test that it is really off. If you are not sure, call a licensed electrician. Electrical work is not a place to guess.
7. Use Peel-and-Stick Tiles
Peel-and-stick tiles are a great gift for anyone who wants a new look without the mess of real tile work. They come in many styles, from classic white subway tiles to bold patterns.
Where to use them:
- On the floor, over old vinyl or flat tile
- On a wall behind the sink as a backsplash
- On an accent wall
- On the front of a tub or shower ledge (dry areas only)
How to install them:
- Clean the surface well and let it dry.
- Plan your layout. Start in the middle of the space so the pieces on both edges are the same size.
- Peel the backing and press each tile firmly into place, working from the center outward.
- Use a utility knife and a ruler to cut tiles to fit around edges and corners.
- Roll over the tiles with a small roller to help them stick.
Good to know: Peel-and-stick tiles work best in areas that do not get soaked all the time. Avoid putting them inside the shower where water hits directly. Also, pick tiles labeled as water-resistant, and seal the edges with a thin line of caulk near wet areas.
For renters, these can be a lifesaver, since many can be removed later. Check the product label to be sure.
8. Add Smart Bathroom Storage
Clutter makes any bathroom feel smaller and messier. If your counters are full of bottles, brushes, and towels, better storage can help more than any new paint color.
Ideas that work well:
- Over-the-toilet shelves: This space is often wasted. A simple shelf or a small cabinet there can hold towels, baskets, and spare rolls.
- Wall-mounted shelves: Floating shelves add storage without using floor space. They also give you a place for small plants and decor.
- Baskets and bins: Use them to sort items like hair tools, cleaning products, or kids’ bath toys.
- Hooks behind the door: They hold robes and towels and cost very little.
- Shower caddies: Choose rust-proof ones that hang from the showerhead or stick to the wall.
- Drawer dividers: Inside your vanity drawers, small trays keep makeup, razors, and toothbrushes from becoming a jumble.
- Tension poles: In tight corners, a tall pole with shelves gives you space to stack things up instead of out.
Simple rule: Keep only what you use each day on the counter. Everything else goes into a drawer, basket, or cabinet.
9. Refresh the Shower Area
Your shower is where a bathroom often looks the most worn. But small changes here have a big effect.
Replace the showerhead: This takes about fifteen minutes. Unscrew the old head by hand or with a wrench, wrap plumber’s tape around the threads, and screw on the new one. A rain-style or handheld showerhead can make daily showers feel like a small treat.
Choose a better shower curtain: A plain white or light curtain hides nothing but looks clean. A patterned one adds color. Use a fabric liner that you can wash in a machine. Hang the curtain rod high, close to the ceiling, so the room feels taller.
Consider a glass door: If you want a bigger change, a glass shower door can make the room feel open. Many kits are made for do-it-yourself installation, but they are heavy, so plan to have a helper.
Clean and restore old surfaces: Sometimes an old tub or shower only needs a deep clean. A paste of baking soda and water, or a good bathroom cleaner, can remove years of buildup. If the surface is truly worn, a tub refinishing kit can help, but follow the safety steps carefully, and keep the room well aired.
10. Choose Fresh Towels, Rugs, and Textiles
Soft items can change how a bathroom looks and feels, and they are the easiest things to swap out.
Towels: Pick two or three colors that match your walls and hardware. Rolled towels in a basket, or neatly folded on a shelf, look like a spa. Replace old, thin, or faded ones.
Bath mat: Choose one with a non-slip back. Cotton and microfiber mats dry fast and feel good under your feet. Wash them often so they stay fresh.
Shower curtain: As mentioned, this is a big visual piece. Match it to your towels for a pulled-together look.
Small rug or runner: If you have room, a runner in front of the vanity adds warmth, especially on cold tile floors.
Keep your color choices simple. A good rule is to use one main color, one support color, and one small pop of color.
11. Bring in Plants and Simple Decor
A bit of green can make a bathroom feel alive, calm, and clean. Many plants like the warm, humid air in bathrooms.
Plants that do well:
- Snake plant
- Pothos
- Spider plant
- Peace lily
- Aloe vera
- Ferns (if you have good light)
If your bathroom has no window, choose a high-quality faux plant, or place a real plant near the door and move it to a bright spot now and then.
Other easy decor ideas:
- A small tray on the counter to hold soap and lotion
- A glass jar for cotton balls
- A framed print that handles moisture well
- A candle or diffuser for a nice scent
- A wooden stool for towels or a plant
Do not overdo it. A few well-chosen items look better than a room full of small things.
12. Try Wallpaper or an Accent Wall
If paint feels plain, wallpaper can add pattern and personality. Modern peel-and-stick wallpaper is easy to use and comes in hundreds of designs.
Tips for success:
- Choose wallpaper labeled as moisture-resistant or made for bathrooms.
- Keep it away from areas that get splashed directly, such as right next to the shower.
- Smooth walls work best. Rough or textured walls make it harder for the paper to stick.
- Measure carefully, and buy a little extra for mistakes.
- Use a smoothing tool to push out air bubbles as you go.
Where to use it: A single wall behind the vanity or toilet is usually enough. It becomes a focal point without making a small room feel crowded. Small bathrooms and powder rooms are perfect places to be a little bold.
13. Fix the Small Things That Bother You Every Day
Sometimes the biggest change comes from repairing the little things you have been ignoring.
- A slow drain: Try a drain snake or a zip tool to pull out hair. It costs little and works fast. Use a mix of baking soda and vinegar as a gentle cleaner, and avoid harsh chemical drain openers when you can.
- A running toilet: Often, the flapper inside the tank is worn out. A new one costs a few dollars and takes minutes to fit.
- A dripping faucet: This is usually a worn washer or cartridge. Replace it to save water and stop that annoying sound.
- A loose toilet seat: Tighten the bolts, or replace the seat with a slow-close one for a quiet, modern feel.
- A squeaky door or loose hinge: Tighten the screws or add a drop of oil.
- A wobbly towel bar: Use wall anchors so it stays firm.
Fixing these things does not just help looks. It also helps your bathroom work properly and can lower your water bills.
14. Improve Air Flow to Stop Mold and Odors
A pretty bathroom will not stay pretty if it stays damp. Mold and mildew love moisture, and once they start, they spread.
Use the exhaust fan: Run it during your shower and for at least twenty minutes after. If your fan is loud, weak, or old, replace it with a newer, quieter one. Many models are made to fit into the same opening.
Open a window: when you can.
Wipe wet surfaces: A quick pass with a squeegee on the shower walls after use reduces water spots and soap scum.
Hang towels to dry: Do not leave wet towels in a pile.
Use a moisture absorber in small bathrooms without windows.
Good air flow protects your paint, your walls, your grout, and your health. It is one of the smartest DIY bathroom improvement ideas because it keeps your other upgrades looking good for longer.
15. Add a Few Spa-Like Touches
Once the main work is done, finish with details that make your bathroom feel like a small retreat.
- Put liquid soap in a nice pump bottle instead of leaving it in the plastic one.
- Keep cotton balls and swabs in glass jars.
- Use a wooden bath tray across the tub for a book or candle.
- Hang a small hook for your robe.
- Add a dimmer switch if your wiring allows it (or use a lamp with a soft bulb).
- Keep a simple scent, such as eucalyptus or lavender.
These little touches cost little but make everyday routines feel more relaxing.
Budget Guide: What to Do First
Not sure where to start? Here is a simple way to choose based on how much you want to spend and how much time you have.
Quick wins (an hour or less):
- Change the bulbs
- Swap the shower curtain and towels
- Replace cabinet knobs
- Add baskets and hooks
- Clean the grout
- Add a plant
Weekend projects (one or two days):
- Paint the walls
- Paint the vanity
- Replace the showerhead, faucet, or toilet seat
- Re-caulk the tub
- Install peel-and-stick tiles
- Hang a new mirror
Bigger projects (a few weekends):
- Replace the vanity or countertop
- Install a new light fixture
- Add a glass shower door
- Install a new exhaust fan
- Re-grout all the tile
A smart way to work is to start with small wins. They build your confidence and show quick results, and you can move on to the bigger jobs once you feel ready.
Common Mistakes to Avoid
Even easy projects can go wrong. Here are mistakes many beginners make, and how to avoid them.
Skipping the prep work: Dirty walls, unsanded cabinets, and wet surfaces cause paint and stickers to peel. Always clean and dry first.
Using the wrong products: Regular paint, glue, or caulk may not survive bathroom moisture. Read the labels and choose products made for damp rooms.
Not measuring twice: Whether it is a mirror, a rug, or tile, measure before you buy. Store returns are annoying.
Rushing dry times: If the box says wait 24 hours, wait 24 hours. Touching or using something too soon can ruin your work.
Ignoring hidden water damage.: If you see soft walls, a musty smell, or dark stains that keep returning, there may be a leak. Fix the source first, or your new paint will fail.
Doing risky work alone: Big electrical or gas work, or major plumbing changes, should go to a licensed professional.
Trying to do everything at once: A bathroom out of use for too long is stressful. Work in stages, especially if you only have one bathroom.
Basic Safety Tips for DIY Bathroom Work
Your safety comes before any design goal. Keep these simple rules in mind.
- Turn off the power: at the breaker before touching any light, fan, or outlet. Test with a voltage tester to be sure.
- Turn off the water: at the shutoff valve before working on faucets or toilets.
- Ventilate the room: when using paint, caulk, glue, or strong cleaners. Open windows and run the fan.
- Never mix cleaning chemicals: Mixing bleach with other cleaners, especially ammonia, can create dangerous fumes.
- Wear safety gear: Use gloves, safety glasses, and a dust mask when sanding, scraping, or cutting.
- Watch for old paint: If your home was built long ago, the old paint may contain lead. Do not sand it dry. Ask a professional or use a lead test kit first.
- Use a stable ladder and have someone nearby if you are working high.
- Lift heavy items with help: especially mirrors, vanities, and glass doors.
If a job feels beyond your comfort level, it is smart to ask for help. Good DIYers know their limits.
Frequently Asked Questions
What is the cheapest way to improve a bathroom?
Paint, new towels, a fresh shower curtain, new bulbs, and better organization cost the least and change the room the most. Cleaning the grout and caulk also makes a big difference for almost no money.
Can I do a DIY bathroom remodel without experience?
Yes, for many tasks. Painting, changing hardware, adding storage, and installing peel-and-stick tiles are good for beginners. Leave major plumbing, wiring, and structural work to licensed professionals.
How can I make a small bathroom look bigger?
Use light colors, hang a large mirror, keep the counters clear, use wall shelves instead of floor cabinets, and choose a clear or light shower curtain. Good lighting also helps a lot.
How long does a DIY bathroom makeover take?
Small updates take a few hours. A full cosmetic refresh, including paint, hardware, lighting, and decor, usually takes one to three weekends, depending on drying times and how much you do.
What paint should I use in a bathroom?
Choose paint labeled for bathrooms or kitchens, or one with mildew resistance. Satin and semi-gloss finishes hold up well against moisture and are easier to clean.
Are peel-and-stick tiles good for bathrooms?
They work well on floors, backsplashes, and accent walls in areas that stay mostly dry. Avoid using them inside a wet shower. Choose water-resistant types and seal the edges near sinks and tubs.
How do I stop mold in my bathroom?
Run your fan during and after showers, wipe wet surfaces, hang towels to dry, fix leaks fast, and keep caulk and grout in good shape.
Should I hire a professional?
Hire one for any electrical rewiring, moving pipes, structural changes, or if you find water damage or mold behind walls. For cosmetic updates, DIY is often a great choice.
Final Thoughts
You do not need a big budget or years of experience to love your bathroom again. With a few smart DIY bathroom improvement ideas, you can make the room brighter, cleaner, and more peaceful, one small step at a time.
Start with the simple things. Paint the walls, swap the hardware, re-caulk the tub, and add a few baskets. Then move on to bigger changes as your confidence grows. Every small upgrade adds up, and the result will be a space that feels like yours.
Take your “before” photos, pick your first project, and give it a try this weekend. You may be surprised at how much you can do on your own.